Showing posts with label decorating tips. Show all posts

Tuesday, January 29, 2019

Trends, trends, and more trends

photo: PDR Interiors

With all this talk about trends over the past few weeks- is your head swimming?  Well, take a breather.  Just because something is on trend, doesn’t mean you need to find a way to incorporate it into your home.  Observe trends as a form of inspiration and as a connection to the world around you.  You can have an appreciation for something without having to buy it.

With your clothing- you know what fits your body and what styles you are drawn to, so you buy items that work for you.  Do the same thing for your home- if you’re all about French Country, hold fast and keep doing your thing.  Don’t change your style just to suit the latest trend in home fashion.  You will exhaust yourself trying to keep up with every fad that comes along. 

My team and I advise clients regularly to focus on the classic and timeless and work in trendy items as desired.  This approach is much kinder to your pocketbook and allows you to dabble in the trendy side of life when you want to.


Push the trends out of your mind for a minute, and follow these few rules of thumb when updating your room-
-Stick to timeless furniture styles and fabrics for your large staple pieces (sofas, chairs, etc.)
-Go bold and trendy in smaller items that are easy to replace more frequently (pillows, curtains, lamps, accessories)
-Consider the style of your home when decorating the interior of it (ie- Craftsman, Victorian, Tuscan, etc). These details should complement each other, not be at odds.


-Liz

Tuesday, September 13, 2016

Transitioning from Summer to Fall Decor

Faux Florals

thesunnysideupblog.com

Decorating indoors with faux florals is a fun way to bring the outside in, especially if you're not one to keep live plants living for very long. If the faux florals you currently have in your home are a bit more summery feeling, you can simply add to them to transition to fall. If you have an arrangement that uses a lot of fun bold colors, you can swap some out for more fall friendly stems. Succulents are hugely popular right now, so adding a few of those is another fun way to add to your current florals to transition them to fall. 

juliakostreva.com

Polka Dots & Rosebuds Interiors

Outdoor Pillow Covers


flamingotoes.com

If you already have your full outdoor seating area set up from the summer time it can be easily transitioned for fall use. If you chose to use a lot of bright summer colors for your outdoor cushions, simply picking up some more neutral outdoor pillow covers is an easy and inexpensive way to make the space feel a little more cozy and fall like. 

apartmentf15.tumblr.com

styleandcheek.com


Tuesday, May 3, 2016

Three Tips for Decorating for a Derby Party


Create a Board with the Horses Names, Numbers, & Silks

Throughout the day at your Derby party, guests will be deciding who they would like to place bets on for the big race. What better way to help them out and create a cute and functional decoration all in one? Simply chose a board (ie. poster, foam, chalk), then number the horses in order with their name and a picture of their silks on the side! This is especially helpful for people like us who choose their picks solely off of the color and patter of the silks. 

mintlovesocialclub.com

flickr.com

 Incorporate Roses and Horseshoes Throughout the Space 

Nothing says Derby more than the combination of roses and horseshoes. These items are easy to come by and to use throughout your home as decoration. One fun way to combine the two is to scatter them along a table runner.. Another great way to combine these Derby-themed items is to buy or make a wreath for your front door out of roses in the shape of a horseshoe!

sheskindacrafty.com

theblueeyeddove.com

Print and Frame the Official “Derby 142” Cards

This is a fun little touch to add to all of your other Derby party decorations. Simply find the official “Derby 142” logo online and print them onto 4x6, 5x7, or 8x10 cards to be put into frames. This is a very inexpensive decoration because you can use frames you already have and just print them at home!


blog.hwtm.com


blog.hwtm.com


For more Derby party decor ideas check out this week's video here >> http://bit.ly/1M5Q2IT


Thursday, May 17, 2012

Tips for a Bedroom Oasis


For so long we used to focus solely on areas of the house that we use for entertaining- think kitchen, living room, dining room. Master bedrooms were just a place we would go for a few hours of sleep between our jam-packed workdays. It's no wonder that we don't feel rested. There is nothing restful or relaxing about spending time in a room that is in disarray, has a hodge podge of furniture and is painted a bland shade of beige.  Finally the bedroom takes center stage. It is becoming a priority over other ares of the home.  We crave a space we can go to when we want to shut out the rest of the world, unwind, and be ourselves. Here are a few ways we can achieve that on any budget:

-Create a focal wall at the head of the bed. Typically, I am against accent walls but not in this case. I think back to the last hotel I stayed in- the Marriott in Indianapolis- the entire wall that backed the headboards was covered in a gorgeous wallcovering. The wall created drama and made the beds the focal point of the room. That same concept applies to our personal bedrooms. We always make the bed the focal point with beautiful bedding, so let's take it a step further and compliment that bedding with a bold paint color or a stunning wallpaper. The goal is to say "wow" whenever you walk into the room. A focal wall can fit any budget.  The cost of primer and paint to cover just one wall is a minimal $50- $100. Wallcoverings vary in cost but only a small amount is needed so it's cost effective compared to covering a whole room and would likely run about $500 or less to complete.

- Incorporate a headboard with personality. Headboards allow for so much creativity. The options range from a beautiful stained wood to scrolling ironwork to a stately upholstered piece. The important thing to remember is that the headboard needs to make sense with your personal style and with the feel of the space. In bedrooms that can't spare the space a headboard requires, I've seen unique ideas like painting one on the wall (think trompe l'oeil) or taking an old door and attaching it to the wall above the bed. Both are great options since there's no extra space required to attach it to the bed frame. Depending on your skill level and your familiarity with Pinterest, you could make a headboard out of wood or fabric for $300-$500. If you are lucky enough to have an old door lying around that just needs a little paint makeover, your budget could be less than $100.

-Pillows! Shams and throw pillows are a major part of creating a luxurious bedroom. I recently took simple white shams and had them monogrammed with large black letters to dress up my bed. Layering those with smaller toss pillows from Home Goods and a custom covered bolster with a bold pattern on it completed the bed. Mixing custom pillows with inexpensive ones makes the project easy on the wallet and on the eyes.  The average cost of a project like this is $100.

- Have a foundation. There is nothing worse than hopping out of bed in the morning and landing on a cold floor. Brrrr! Be sure your new bedroom oasis includes a rug that feels good underfoot. Beyond the extra steps of warmth it affords you, it offers another layer to complete the room. The colors and pattern in the rug should serve as the foundation for the space. Make the right choice here and build everything else around it. The fiber content and size of the rug will typically dictate the price. Wool will be more costly than a man made fiber but it is worth the splurge. An average 8x10 costs $700-$900.

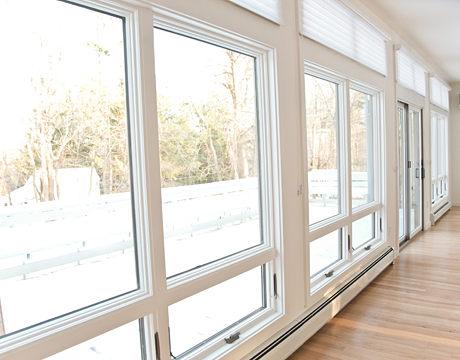
- Dress your windows. The most forgotten element of a room is window treatments. Walk into any house and look at the windows. Chances are they are stark naked! Don't let the same be said about your master bedroom. Much like a rug, fabric treatments on the windows are another way to incorporate color and pattern into the space.  The entire room should feel like it was well-thought out and put together with care. That said, well-thought out does not have to equal big bucks.  Many times drapery panels found at local home stores can serve your purpose. Be sure to take the panels from floor to ceiling to make the window and the room feel larger. This is especially helpful if you have crown molding because it draws the eye to that architectural detail. Most retailers offer varying lengths of panels so finding the right height for your window shouldn't be an issue. But if it is, you can add additional fabric to the bottom to lengthen the panel and it creates the color block look that is popular right now. Store bought treatments often cost $50 per panel. If the sky is the limit for your project, I recommend having motorized shades installed under your draperies. With one push of a button you can lower all the shades and block out light for a good night's (or day's) sleep. These treatments can run upwards of $700 per shade depending on the size of the windows in the bedroom.

-Veer away from matching sets. Resist your urge to pluck the entire bedroom suite off the showroom floor. Instead be more creative. Use small chests and interesting side tables in place of ordinary nightstands. Thrift stores can be your best friend for smaller furniture items with a unique twist for $200-$500 each.  Mix and match pieces with purpose. The key is to have elements of continuity among all the pieces whether that be wood tone, hand painted features, or coordinating drawer pulls.  If you are looking for a must-have piece, I suggest buying a dresser with a mirror that also houses your TV. Flat screens have done wonders for the modern world and now they offer a solution to the debate between husband and wife about the television sitting on the dresser. Simply slide the flat screen into the designated opening on the side of the mirror and with a click of a button allow the mirror to go transparent and the TV to be viewed. When the time comes you can click the button again and the reflective quality returns to the glass.  As you can imagine these dressers are not inexpensive and can cost $3000 or more depending on the furniture maker.

Any one of these changes can create an impact on their own, so certainly implementing all of them would completely transform a space. For smaller budgets, prioritize the changes you want to make and work your way through the list as money allows.

Excerpts from this post can be found in the May 2012 issue of Kentucky Living magazine

Monday, March 5, 2012

Double Duty Furniture


I say it all the time- I am an efficiency nut!  I adore anything that has more than one purpose. A furniture piece with multiple functions becomes my favorite item in a room that I am working on.  As I was reading up on trends in the design world for 2012, I was delighted to read that multi-purpose furniture is catching on.  I could care less about the fact that I could now be considered trendy.  I’m thrilled to pieces because it means I will have more options for my clients who also love a piece that is full of function!  I had to share a few photos of some items I am in love with.  Enjoy!
 Seats tuck neatly under this cocktail table so they are out of the way until needed for guests.

You won't find dust bunnies under this bed!  Built-in drawers provide a place to store sweaters or maybe even extra bed linens.  (I have a similar piece in my bedroom and cannot say enough good things about it!)


Thursday, March 1, 2012

Room to Move


Space plans are the most important thing I do for clients.  Those plans are why I am so helpful to them.  Without a space plan, too much furniture gets shoved into one room leaving very little space to comfortably move about and to enjoy everyday tasks.

The tasks that are most commonly forgotten when placing furniture in a room are:
-Sitting down for conversation.  It's the truth.  People tend to line furniture up along the walls making it difficult to converse with each other without shouting across the room.  Seat groupings allow for easier conversation and a more intimate feeling for guests.  The number of groupings you can fit into a space depends on room size and furniture scale.

-Getting up from the table.  There is a lack of understanding about how much space should be allowed from the edge of the dining table to the wall or even just the edge of the area rug so chairs can be pulled out comfortably.  It is awkward and uncomfortable to have to squeeze into your seat because the chair is backed up against the wall.  How silly do you feel when guests scoot their chair out and end up with uneven chair legs because the front two are placed on the rug and the back two are on the flooring below.  Simple mistakes to avoid, but it requires attention (and a space plan).  30-50 inches of space is recommended around the table edge.

-Sitting in front of a cocktail table.  This can be a bit of a balancing act.  You want the table close enough to be reached when placing a drink or a book on it, but far enough away to allow for legroom when sitting and ample space to pass between the sofa and table.  My typical rule of thumb is 15-18 inches.

Monday, September 26, 2011

Vintage Vantage Point

I’m Liz and I’m a Madmen-aholic.  It’s true.  I love some Roger Sterling and Don Draper.  Better yet, I love eyeing the set design for the show.  Set in the 60’s- one of my favorite eras for fashion and furniture- the homes and offices used for the show are so eye-catching.  Sleek, low-profiled sofas.  Sprinkling in metal and glass furniture to modernize a room.  Clean lines and silhouettes.

I think this period is my favorite because everything fit well.  We weren’t wearing baggy clothes OR bustles under our skirts.  A woman’s feet would touch the floor when she sat in a chair, as opposed to the overstuffed and incredibly deep seats abundantly available now.  Tailoring is classic and beautiful and the 60s were full of tailored pieces.  Here are a few things from that decade that I find inspiring:
Portrait Collars


Streamlined furniture


Picture Windows

Monday, September 19, 2011

Black & White


It's black. It's white.  As I am typing, I am humming Michael Jackson's hit  (As mentioned in previous posts, everything to me related to a song).  I'm sure that you are glad this is a text post and not a video!

Enough about music, I really want to talk about the trend of using black & white in home decor.  These colors have been strong in the fashion world for the past couple seasons and now are making a big splash into the home scene.  Everything from checkerboard tile floors to mod bedding to luxurious throw pillows. 

Some people are jumping into the trend and re-doing entire rooms to reflect their love for black & white.  If you aren't so sure, start off slow.  Introduce black and white in small ways.  Ceramic accessories in these solid colors lend an air of sophistication to a bookcase.  Are you afraid of being void of color? Choose a gorgeous wall color like turquoise, use all black and white patterned fabrics in the space and top it all off with a punch of yellow in the throw pillows and accessories.  Be careful not to overdo the yellow, or it will lose it's impact.

Don't forget about Christmas decorating with these colors!  White has always been a favorite for the feel of fresh fallen snow that it provides.  Pairing black and a dash of silver with it takes the decor to a Chanel level.  Very chic, classy and beautiful.

Thursday, September 15, 2011

Stretching the Dollar to Cover Your Windows

We all want unique items.  There is something about having what no one else does that makes us proud.  But sometimes lack of time and money get in the way of us having one-of-a-kind pieces.  When it comes to window treatments like draperies there IS a way to have the best of both worlds.  Store- bought window treatments can be dressed up to appear as if they were custom made.  Adding trims with beads, baubles or tassels instantly allow the panels to appear expensive.  Another embellishment option that gives a more streamlined look is adding a band of fabric along the edge of the treatment. 

Don't forget about the hardware.  My advice to my clients is to always splurge on a rod with a larger diameter (1.5- 3 inches). Steer clear of the thin half-inch metal poles that look as though they will snap if you stare at them too long.  Finials add a sophisticated element that enhances the decor of the room. You want a finial to have some weight to it so it looks sturdy and correctly proportioned to the size of the rod.

A popular look for hardware right now is to use a pair of shorter rods instead of one long one.  This can only be done if the panels are not functional (meaning they do not open and close).  I refer to non-functional panels as "dummy panels".  You hang these drapes on either side of the window, each with its own rod.  The appeal to this method is that you aren't staring at a rod that sprawls the width of the window.  Instead your eye can focus on the beautiful draperies that flank the window casing. 

Happy window dressing!

Monday, September 12, 2011

Hidden Potential


I am always on a quest to re-purpose things.  If an item has multiple uses, you can bet that I will buy it.  I'm not sure where my affinity for function is rooted, but it's rooted deep!  That's why I had to share my top three favorite pieces that are off the charts in both beauty & function!

1.  Cocktail table seating.  A storage ottoman that also serves as a bench seat during parties.  A round glass-topped table with four seats tucked below.  Either option makes a room that is short on space more useable.  I have implemented these options for clients who regularly hosted friends and needed additional seating.  The dual purpose makes me giddy!

2. Trundle Beds.  I know bigger is considered better nowadays.  But I still love twin beds, especially daybeds!  They are perfect solutions for kids or small guest rooms.  Storing a trundle underneath affords you the option of allowing the kid's friends over for slumber parties or creating a double bed when your out-of-town friends come for the weekend.

3. Serving Platters.  Pewter, ceramic, wood or glass trays have a million uses.  Of course, they come in handy for displaying yummy appetizers at parties.  But their function goes so much farther than that.  Platters can be used to adorn the top of your kitchen cabinets or dining room hutch.  They can be placed on your coffee table to serve as a gathering place for the remotes or magazines.  Resting on top of your bedroom dresser, a tray can be the gathering place for loose change, your wallet and car keys. 

If you are tight on space or a neat freak (like me!), these three pieces can completely change your space!

Thursday, September 1, 2011

All the Leaves are Brown


Crisp air.  Cable knit sweaters.  Skinny jeans.  Boots.  They all point my absolute favorite season!  Fall!   Not everyone shares my sentiments, though.  Here are a few suggestions on how to ready yourself & your home for the cooler temps without adorning the front stoop in scarecrows & pumpkins.
  1. Swap out your lightweight cotton throws with those made of a heavier a material.  Great replacements are crocheted or lambswool.  Both visually signal warmth and comfort- things we all desire as the weather turns cool.
  2. Exchange brightly colored candles for earth-tones.  Another subtle signal that compliments the changes outside. 
  3. Update your front porch.  Potted mum or a gorgeous arrangement to hang on the front door allow your house to blend well with the landscape. 
If  you typically grumble at the thought of summer’s end.  Try these simple changes to see if they make the transition to fall any easier on you.
Happy Fall!

Thursday, August 25, 2011

Collections


Nostalgia, interest and sometimes greed feed into our desire to collect things.  Some people collect baseball cards, others collect old movie posters.  As child, I collected porcelain clown figurines.  I now have hundreds of these delicate, handpainted pieces stored away in boxes.  To be honest, I have no idea what to do with them.  How many of us are like that?  We buy and collect all these things we want, but then we just end up storing them away in the basement of attic because we don’t know how to use them.  

Watching an episode of Design Star earlier this week provided great inspiration.  A couple collected old records.  The designer decided to showcase those records as art.  Square wooden blocks were attached to the wall arranged in a grid formation to create a platform.  Then one record was screwed into each platform.  What a fantastic way to fill a wall with a unique art piece!  Additionally, it made the room more personal to the homeowners AND cleared out boxes of records that would otherwise collect dust. 

It can be challenging to think outside the box but when we do we can usually come up with awesome ways to re-purpose the things we love!  I’m tempted to (cover your ears, Mom) take all my porcelain figurines and bust them into pieces that I can use in a mosaic.  I could create a mirror frame or a back-splash out of the pieces instead of letting them age in the cardboard walls of a moving box.  What will you do with your collector’s items?